Understanding the Starlink Roof Mount
What is a Starlink Roof Mount?
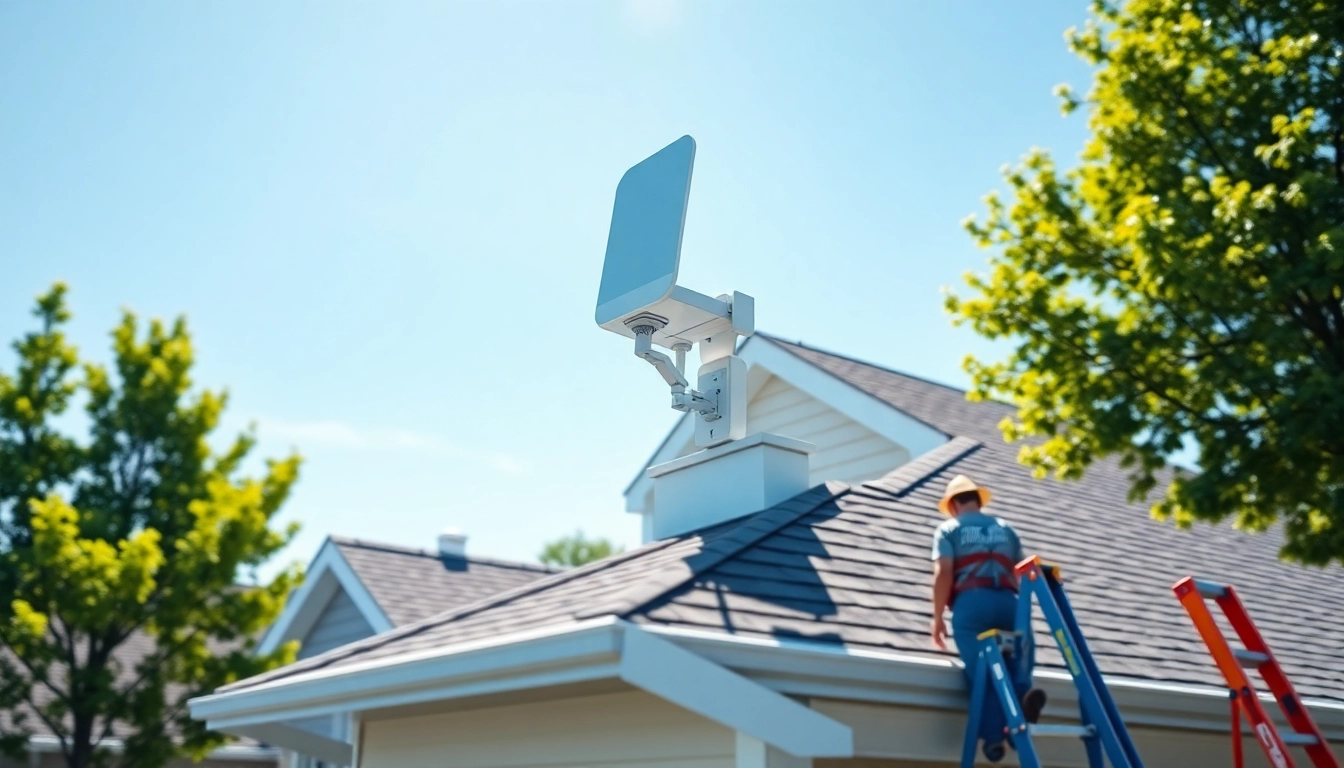
The starlink roof mount serves as an essential accessory for users seeking to maximize their Starlink satellite internet experience. Designed specifically to provide a secure and stable point for satellite dish installation on roofs, the mount enhances connectivity by enabling optimal positioning of the satellite dish for uninterrupted signal reception. With the rise of satellite internet, reliable mounting solutions have gained prominence, ensuring users can set up their systems correctly and effectively.
Key Features of the Starlink Roof Mount
Key features of the starlink roof mount include:
- Durable Materials: Manufactured from high-quality, weather-resistant materials that can withstand harsh environmental conditions.
- Easy Installation: The design facilitates a straightforward installation process, accommodating various roof types.
- Adjustability: Features adjustable components that enable precise angling of the dish to improve signal reception.
- Compatible Design: Specifically engineered for compatibility with Starlink satellite dishes, preventing issues associated with generic mounts.
Benefits of Installing a Starlink Roof Mount
Installing a starlink roof mount presents multiple benefits, including:
- Enhanced Signal Quality: By positioning the dish at an optimal height and angle, the mount significantly reduces obstructions and boosts signal strength.
- Stability in Inclement Weather: Ensures that the dish remains securely in place during storms or high winds, preventing loss of connectivity.
- Improved Aesthetics: A well-installed mount can seamlessly blend with the roofline, maintaining the home’s appearance while providing functionality.
- Longevity: Protects the satellite dish from potential damage, ensuring its operational lifespan is extended through proper maintenance and functionality.
Installation Process for the Starlink Roof Mount
Preparing for Installation
Before proceeding with the installation of the starlink roof mount, preparation is key to ensuring a successful setup. Gather necessary tools such as a drill, screwdriver, and level. Review the installation manual provided by the manufacturer, and consider the following:
- Safety Gear: Use safety goggles and gloves during installation to protect against any injuries.
- Check Weather Conditions: Opt to install the mount on a clear day to avoid slippery conditions and ensure a secure fit.
- Assess Roof Type: Determine whether your roof is flat, sloped, or has shingles, as this will influence the installation method.
Step-by-Step Installation Guide
Follow these steps for a successful installation of the starlink roof mount:
- Mark the Installation Point: Determine the best location on your roof for the mount, ideally facing south to avoid obstructions.
- Drill Pilot Holes: Using the drill, create pilot holes in the designated spots marked for the mount installation.
- Install the Mount Base: Secure the mount base using screws provided in the installation kit and ensure it is level.
- Attach the Dish: Once the base is secure, attach the Starlink dish and adjust the angle as needed for signal optimization.
- Connect Cables: Run the necessary cables to connect the dish to your indoor router, following the manufacturer’s guidelines.
- Test the Connection: Before finishing up, test the signal strength to ensure optimal performance.
Common Challenges During Installation
When installing the starlink roof mount, several challenges may arise:
- Uneven Roof Surfaces: Difficulty in achieving a level installation can compromise signal reception. Utilizing shims can help balance the mount.
- Limited Access: Difficulties in reaching certain areas of the roof may pose safety risks. Consider using scaffolding or a safety harness if necessary.
- Weather Interferences: Rain or strong wind can complicate the installation process. It’s advisable to postpone installation in unpredictable weather.
Optimal Location for the Starlink Roof Mount
Factors Influencing Mount Location
Choosing the right location for the starlink roof mount involves evaluating several factors:
- Height: Mounting the dish higher generally improves signal reception by minimizing obstructions.
- Angle: The dish should be angled slightly upwards to maintain a clear line of sight to the satellite.
- Surrounding Environment: Assess trees, buildings, and other structures that may block the satellite signal. A clear view of the sky is essential for optimal operation.
- Accessibility: Consider how easy it will be to access the mount for maintenance and adjustments in the future.
Avoiding Obstructions for Maximum Signal
To maximize signal strength, it is vital to avoid any obstructions around the mounting site:
- Clear Vegetation: Trim trees or shrubs that may grow taller and potentially impede the signal in the future.
- Avoiding Other Antennas: Ensure the satellite dish is positioned at least several feet away from other antennas or devices that could interfere with its performance.
- Regular Monitoring: Keep an eye on surrounding developments or plant growth that could eventually obstruct the dish’s line of sight.
Safety Guidelines for Roof Installation
In order to ensure a safe installation process, adhering to safety guidelines is paramount:
- Use Proper Equipment: Always utilize ladders and harnesses rated for your body weight and the environment you’re working in.
- Work with a Partner: Having someone assist you can improve overall safety and provide additional support as needed.
- Inspect Weather Conditions: Avoid installations during adverse weather conditions (rain, snow, high winds) to mitigate safety risks.
- Follow Local Regulations: Ensure that you comply with local building codes and regulations, which may require permits for roof installations.
Maintenance Tips for the Starlink Roof Mount
Regular Inspection and Cleaning
To maintain optimal performance of the starlink roof mount, regular inspection and cleaning are important:
- Visual Inspections: Conduct checks periodically, especially after severe weather, to ensure that there are no damages or loose fittings.
- Cleaning the Dish: Remove debris, such as leaves or dust, from the satellite dish to ensure unobstructed signal reception.
- Check Cables: Inspect the cables for signs of wear, especially if they are exposed to harsh weather conditions.
Adjustments for Seasonal Changes
Seasonal changes can affect the performance of your starlink roof mount. Consider these adjustments:
- Snow and Ice: If heavy snow accumulates on the dish, it may obstruct signals. Gently remove snow or ice buildup to restore functionality.
- Fall Debris Management: During fall, leaves can collect and block the dish. Regularly clearing these is advisable.
- Wind Resistance: Strong winds can shake the mount, so check for stability and perform any necessary reinforcements before stormy weather arrives.
When to Seek Professional Help
While many homeowners can manage installation and maintenance, certain situations may require professional assistance:
- Structural Concerns: If the roof has visible damage or instability, a professional assessment is recommended.
- Complex Roof Types: Roofs with steep slopes or unusual architecture may complicate installation and require a professional’s expertise.
- Sustained Connection Issues: Persistent signal problems may necessitate professional troubleshooting and adjustment.
Comparative Analysis of Mounting Options
Starlink Roof Mount vs. Pole Mount
The choice between a starlink roof mount and a pole mount entails a few considerations:
- Stability: Roof mounts tend to offer a more stable signal due to their elevation, while pole mounts can be affected by wind.
- Height Adjustment: Pole mounts may allow for greater adjustability in height; however, roof mounts generally provide a permanent and reliable solution.
- Installation Complexity: Roof mounts usually require less complex installation than pole mounts, which may require more extensive groundwork.
Mobility Options for Temporary Setups
For users who require temporary setups, such as campers or seasonal dwellers, consider these mobility options:
- Portable Mounts: Several lightweight and collapsible mount options exist, providing ease of transport and quick assembly.
- Tripod Mounts: These can be easily set up and taken down, offering flexibility if the location frequently changes.
- Ground-Based Solutions: Instead of mounting on a roof, setting up in open areas using ground mounts can serve as a temporary solution.
Long-Term Benefits of Permanent Mounting
While temporary solutions offer flexibility, permanent mounting solutions provide distinct long-term advantages, including:
- Reduced Installation Frequency: Once installed, permanent mounts require less frequent adjustments and maintenance.
- Enhanced Signal Consistency: Permanent setups generally deliver more consistent signal quality, crucial for video streaming and online activities.
- Value Addition: A well-installed satellite system can significantly increase property value, appealing to potential buyers looking for such amenities.